

How to Brew Pour-Over Coffee at Home: Step-by-Step
Table of Contents
- What You'll Need Before You Brew Pour-Over Coffee
- Step 1: Rinse the Filter and Preheat Your Vessel
- Step 2: Dial In Your Pour-Over Coffee Grind Size
- Step 3: Get the Pour-Over Coffee Ratio Right
- Step 4: Set the Water Temperature for Pour-Over Coffee
- Step 5: Bloom, Pour, and Learn How Long to Brew Pour-Over Coffee
- Troubleshooting: Fix Bitter, Sour, or Weak Pour-Over Coffee
- Conclusion
- Frequently Asked Questions
Last Updated: October 17, 2026
What You'll Need Before You Brew Pour-Over Coffee
Pour-over coffee is a manual brewing method where hot water is poured slowly over coffee grounds in a paper or reusable filter, giving you full control over flavor and strength. At theITDGroup LLC, we roast beans to order, and pour-over brewing is the best way to taste what fresh beans can do.
The gear list is short and cheap:
- Pour-over cone or dripper (ceramic, glass, or plastic)
- Paper filters made for your cone size
- Gooseneck kettle for a slow, steady pour
You can skip the scale and timer at first, but your cups will be less consistent. A scale is the one upgrade to buy first.
Step 1: Rinse the Filter and Preheat Your Vessel
Place the paper filter in the cone and run hot water through it until fully wet. This washes away papery taste and preheats your mug or carafe.
Skip this step and you will taste it, especially with lighter roasts like our Ethiopia Natural, where delicate fruity notes are easy to bury.

Rinse reusable metal or cloth filters too, to clear dust or old oils.
Step 2: Dial In Your Pour-Over Coffee Grind Size
The right pour-over coffee grind size is medium to medium-fine, roughly the texture of table salt. If the grounds look like powder, they are too fine.
Grind right before you brew. Freshly ground coffee keeps more aroma, and it takes about 30 seconds with a decent burr grinder.
Grind size controls how fast water moves through the bed. Too fine and the water stalls into bitterness; too coarse and it races through, leaving a thin, sour cup.
Fix the grind before blaming the beans.
Step 3: Get the Pour-Over Coffee Ratio Right
The pour-over coffee ratio we recommend is 1 gram of coffee to 16 grams of water. For a standard 8-ounce cup, that means about 15 grams of coffee and 240 grams of water.
| Serving Size | Coffee | Water | Notes |
|---|---|---|---|
| Small cup (8 oz) | 15 g | 240 g | Good single serving |
| Standard mug (10 oz) | 18 g | 290 g | Most common home size |
| Large mug (12 oz) | 20 g | 320 g | Watch your dripper's capacity |
| Two cups (20 oz) | 32 g | 510 g | Brew in two rounds if needed |
Want it stronger? Tighten to 1:15. Lighter? Open to 1:17. Change one variable at a time.
Weigh both coffee and water. Eyeballing scoops guarantees inconsistency you can never repeat.
Step 4: Set the Water Temperature for Pour-Over Coffee
The target water temperature for pour-over coffee is between 195°F and 205°F, with 203°F a solid middle ground.
No thermometer? Boil your kettle, then let it sit about 30 seconds off the heat. A gooseneck kettle with a temperature setting removes the guesswork.
Use filtered water if your tap water tastes like anything at all. Coffee is mostly water, and chlorine or heavy minerals will show up in the cup.
Step 5: Bloom, Pour, and Learn How Long to Brew Pour-Over Coffee
The total brew time for pour-over coffee is about 3 to 4 minutes, including a 30 to 45 second bloom. The biggest upgrade over the average home brewer is pouring to a schedule instead of by feel. Below is a tested schedule for a standard 10-ounce mug (18 g coffee, 290 g water), scalable using the ratio table above.
The pour schedule, in grams
| Stage | Target scale reading | Time window | What you are doing |
|---|---|---|---|
| Bloom | 36 g (2x coffee weight) | 0:00-0:45 | Wet all grounds, then wait |
| Pour 1 | 145 g | 0:45-1:15 | Slow spirals, center outward |
| Pour 2 | 220 g | 1:30-1:50 | Same spiral, keep bed level |
| Pour 3 | 290 g (total) | 2:05-2:25 | Final pour, gentle finish |
| Drawdown | , | 2:25-3:30 | Let the bed drain fully |
Treat the time windows as guardrails, not a stopwatch test. The scale readings are the hard numbers.
What each stage should look like
- Bloom. Pour about twice the weight of your coffee in water (roughly 30 to 40 grams) and stop. Wait 30 to 45 seconds. The bed will puff up and release gas, which is a sign of fresh beans. A flat, quiet bed usually means older beans, still brewable, but expect less aroma.
- First pour. Pour in slow circles from the center outward, keeping the water level below the rim. Bring the scale to about 145 grams. The bed should look like wet sand, not a swimming pool; if water is pooling on top, you are pouring faster than the bed can drain.
- Second pour. Wait until the bed settles slightly, then pour the rest in the same circular motion to about 220 grams. Keep the stream centered, water that runs down the filter wall bypasses the coffee and thins the cup.
- Final pour. Ease off to a gentle stream and finish at your total water weight. Give the dripper a small, level swirl if your cone allows it; this settles the bed flat and helps the last of the water drain evenly.
- Drawdown. Let the water drain fully through the grounds. The bed should finish flat, not cratered. A flat bed is the visual signature of an even pour; a crater means the water channeled through one spot.
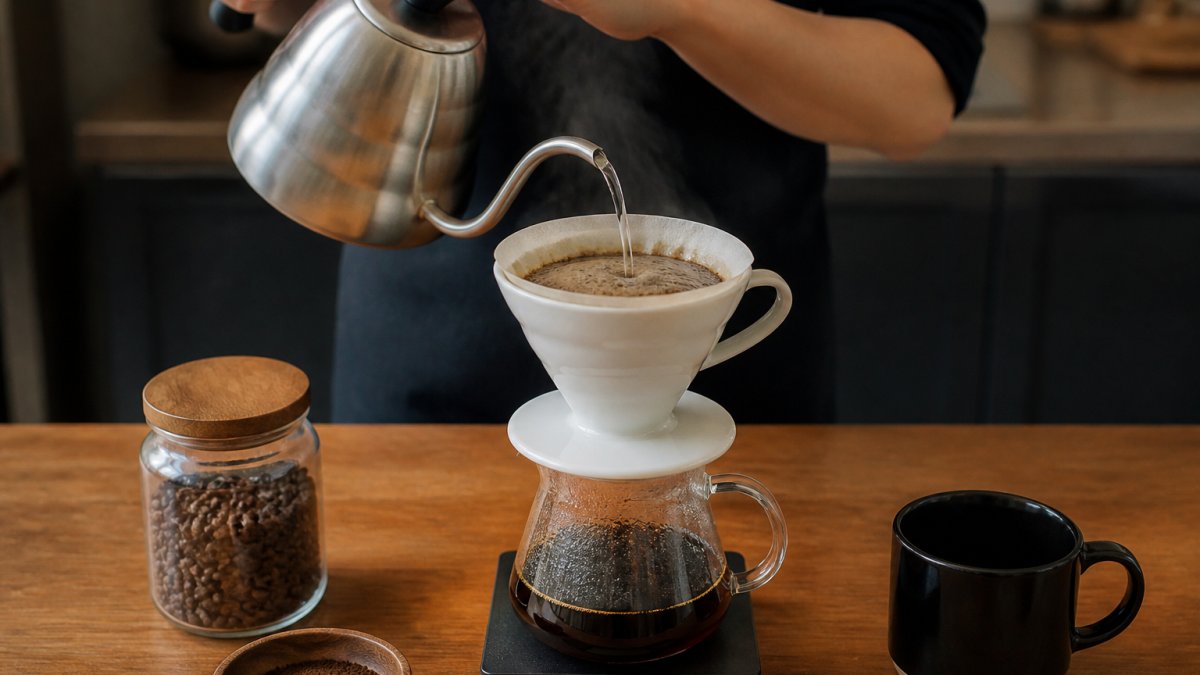
Reading the drawdown
The drawdown, the time from your last pour until the bed stops dripping, is the most honest feedback your brew gives you. For a single 10-ounce mug, aim for the bed to finish draining roughly 30 to 60 seconds after your last pour, putting total brew time in the 3 to 4 minute window.
- Finishes in under 2 minutes: grind is too coarse or you poured too fast. The water is racing past the grounds before it can extract.
- Stalls past 5 minutes: grind is too fine, or too many fines are clogging the filter. Go one notch coarser before changing anything else.
- Drains unevenly, with a crater: your pour was too aggressive or off-center. Slow down and keep the stream in the middle third of the bed.
Keep the pour slow and steady. A fast dump disturbs the bed and pushes water down the filter sides, causing uneven extraction, the gooseneck spout exists for exactly this reason.
Scaling the schedule to other serving sizes
The schedule above is for one mug. For the larger sizes in the ratio table, keep the same stage structure but stretch the time windows:
- 12-ounce mug (20 g / 320 g): bloom to 40 g, then three pours to roughly 160 g, 240 g, and 320 g. Expect total brew time of 3:30 to 4:30.
- Two cups (32 g / 510 g): bloom to 64 g, then four pours of roughly 175 g each. Expect 4:30 to 5:30 total. If your dripper's capacity is tight, brew in two rounds rather than overfilling the cone, an overflowing cone forces water down the filter wall and ruins the cup.
Write your successful numbers down. Once a schedule works for your grinder, dripper, and mug, repeat it exactly and change one variable at a time for a new bean.
Troubleshooting: Fix Bitter, Sour, or Weak Pour-Over Coffee
Most pour-over guides stop at "adjust your grind", true but useless without a decision order. This method uses two inputs, taste and brew behavior, to point at the one variable most likely wrong. Change one thing per brew, taste again, and log the result.
Start with behavior, then taste
Before you sip, look at the brew. Behavior narrows the problem faster than taste alone:
| What you observed | What it usually means | First fix |
|---|---|---|
| Bed drained in under 2 minutes | Grind too coarse, or pour too fast | Grind one notch finer |
| Brew stalled past 5 minutes | Grind too fine, or filter clogged with fines | Grind one notch coarser; check filter |
| Water pooled on top during pours | Pouring faster than the bed drains | Slow the stream, pour in smaller pulses |
| Bed finished cratered or uneven | Aggressive or off-center pour | Keep stream centered, gentle final swirl |
| Bed finished flat and on time | Technique is sound, adjust recipe, not method | Move to the taste table |
Then match taste to the fix
| What you taste | Likely cause | Fix, in order |
|---|---|---|
| Bitter, dry, lingering finish | Over-extraction: grind too fine or water too hot | Grind one notch coarser, then drop temperature about 5°F |
| Sour, sharp, thin | Under-extraction: grind too coarse or water too cool | Grind one notch finer, then raise temperature about 5°F |
| Weak and watery but not sour | Ratio too loose or too little coffee | Tighten to 1:15 and weigh again |
| Harsh and astringent | Water channeling down the filter wall | Pour more gently, keep the stream centered |
| Muddy or silty cup | Too many fine particles | Check grinder consistency; avoid over-grinding |
| Flat, dull, no sweetness | Water quality or stale beans | Try filtered water; check roast date |
The order of operations
When a cup is off, work through the variables in this order:
- Grind. It has the largest effect on extraction and is the easiest to change. One notch at a time, most burr grinders have enough steps that a single notch is a real adjustment.
- Ratio. Only after grind is dialed in. If the cup is the right strength but the wrong flavor, the problem is grind or temperature, not ratio.
- Temperature. A 5°F change is noticeable; a 20°F change is a different recipe. Stay inside the 195°F to 205°F window and nudge within it.
- Pour technique. Last, because it is the hardest to repeat consistently. If you have been pouring fast, slowing down is effectively a grind change, expect to re-dial the grind afterward.
When the problem is not your technique
Some cups cannot be fixed at the grinder. Two common culprits:
- Water. If every bean tastes dull or chalky no matter how you adjust, your water is the suspect. Filtered water with a moderate mineral content extracts more evenly than very soft or heavily chlorinated water. If your tap water tastes like anything at all, brew with filtered water for a week and compare.
- Bean freshness. Beans roasted within the last few weeks bloom actively and give you a clear read on your technique. Older beans go flat, bloom weakly, and make every problem harder to diagnose. If your bloom barely puffs, the beans, not your pour, may be the limit.
Conclusion
Brewing pour-over coffee at home comes down to five habits: rinse, grind fresh, weigh, watch your temperature, and pour slowly. Nail those and you will stop guessing and start repeating good cups. When you want beans that give your technique a fair shot, our freshly roasted single origins are the place to start. Find your perfect roast and taste the difference fresh makes.
Frequently Asked Questions
How much coffee should I use for pour-over coffee?
Start with 20 grams of coffee for a 12-ounce (about 340 grams) cup, which works out to roughly a 1:17 pour-over coffee ratio. If you want a stronger cup, drop to 1:15 by using 22 grams of coffee for the same amount of water. A digital scale matters more here than for most brew methods, because small differences in dose change the flavor noticeably. Weigh your beans before grinding, then weigh your water as you pour.
Do I need a gooseneck kettle to make pour-over coffee at home?
A gooseneck kettle gives you the control to pour a slow, steady stream, which helps with even extraction. That said, you can brew pour-over coffee with a regular kettle if you pour carefully from a low height and keep the stream narrow. A spouted measuring cup works too. The technique matters more than the equipment, so start with what you own and upgrade once the habit sticks.
Why does my pour-over coffee taste bitter or weak?
Bitter coffee usually means the water was too hot, the grind was too fine, or the brew ran too long. Weak or sour coffee points the other way: water too cool, grind too coarse, or too little coffee for the amount of water. Change one variable at a time. If it is bitter, coarsen the grind slightly or drop the water temperature a few degrees. If it is weak, add a gram or two of coffee before touching anything else.
Can I use regular coffee filters for pour-over coffee?
Yes, as long as the filter fits your dripper. Standard basket-style paper filters work in most cone drippers, though they may need a quick rinse and a trim to sit flat. Avoid filters with a strong paper smell, and always rinse with hot water before adding coffee. A reusable metal or cloth filter is another option: it lets more oils through for a heavier body, but it needs thorough cleaning after every brew.